My son and I both enjoy drawing and doing art projects. We also share an impatience with the slow process of learning how to get better at it.
When I was a kid, I really loved drawing. But a lack of progress in my skills and lack of confidence caused me to quit doing it as I got older. I tried getting back into it as an adult but always struggled and quit—even after seeing a lot of growth while taking some design classes that required drawing.
The same thing is happening with my son. He also has a tendency to rush through projects and get frustrated with the results. So, I wanted do an art project that would help us improve our art skills and teach the value of patience and taking your time. Something that required multiple steps we could do on days we had extra time.
OUR ART PROJECT:
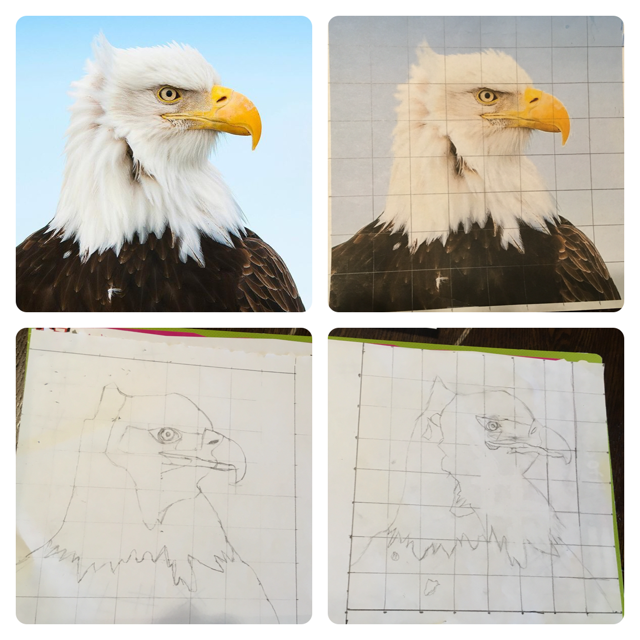
We used the Grid Method for drawing our picture. It was new to my son, but something I tried before in a drawing/design class. This involves drawing a grid over the photo you want to replicate. Then drawing the same proportional grid over your art paper. This helps keep the proportions and focus on one section at a time.
- Draw Your Grids
Find and print out a subject photo. Draw a grid over it in pencil. Then, draw the same grid on a piece of sketch paper. I found a great eagle picture on the National Geographic Instagram account. Taken by Florian Schulz. - Draw the Lines Within the Grids
We started at the bottom left and worked our way grid-by-grid in whatever direction from there. We didn’t do all the details because I just wanted us to get a basic outline and section breakdown.
Steps 1 & 2, with a little of Step 3 - Erase Your Gridlines
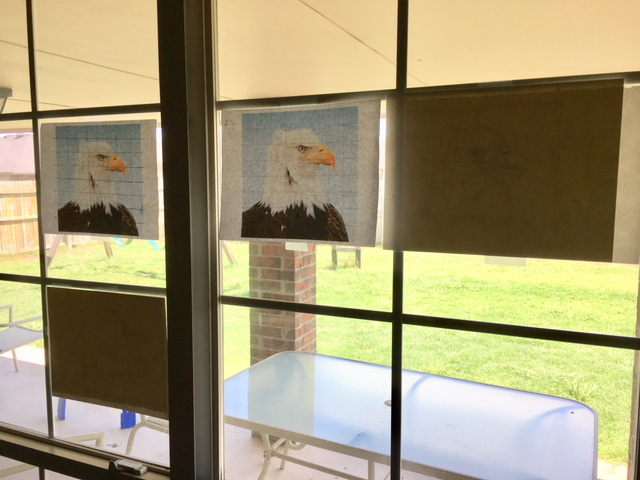
This leaves only the general subject lines—which should be in the right spot/proportions. - Trace Your Drawing to Better Paper
We used a thicker, Bristol board paper that works well with all dry mediums. We needed to try to draw with lighter pressure because we would be erasing these lines as well later.
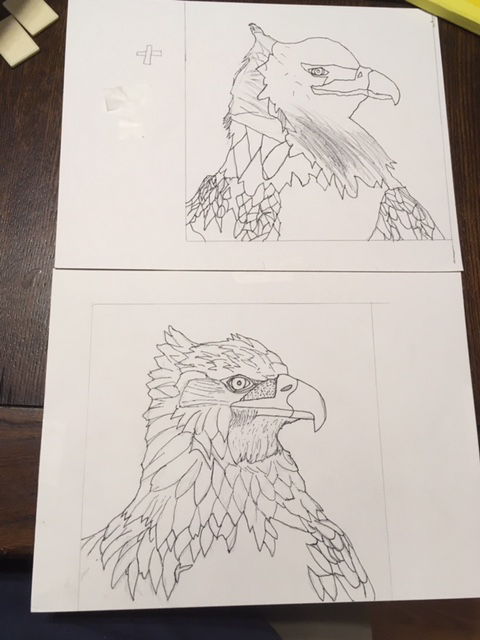
Step 4 - Draw in Details
These were harder to do and took some going back to step 4 a bit—but with the original photo. Plus, guessing on our part for things like feather location/design. If we do this again, we’ll get more of those done in step 2. - Go Over Pencil Lines in Pen
We tightened up our lines in this step as well. It also required more carefulness because these lines couldn’t be erased. - Erase Pencil Lines as Much as Possible
It was really neat to see the drawing pop out at this point.
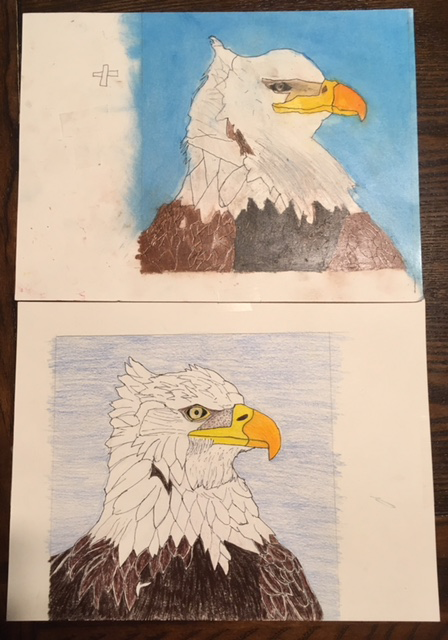
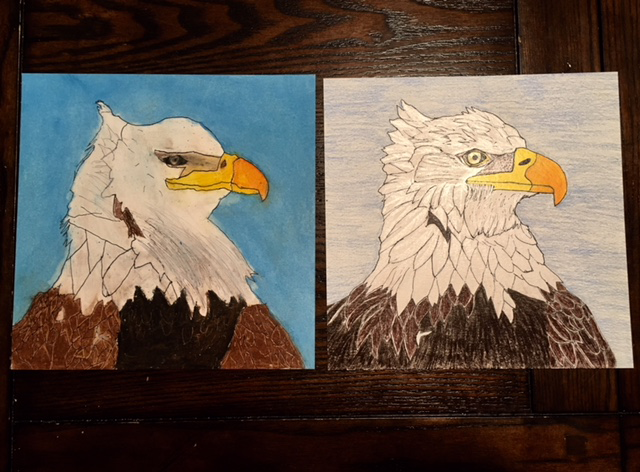
Step 7 - Color Final Drawing
My son used oil pastels—which he never used before. I used colored pencils because we didn’t have two sets of the pastels and would both need the same colors.
Step 8 - Trim Paper and Seal it
I cut away the extra areas of paper and sprayed some finishing spray on our drawings so they wouldn’t smudge if touched later.
Step 9
ART LESSONS LEARNED:
- The Grid Method for drawing.
- Noticing details and replicating what you see – imperfections and all.
- Working with new mediums – oil pastels for him, doing serious coloring with colored pencils for me.
- Mixing colors to match what you need – each coloring medium had its own combinations and techniques.
- Using cover paper to avoid smudges – placing a clean piece of paper under your hand while drawing.
LIFE LESSONS LEARNED:
- Patience – this was a slow process and required some experimenting on other pieces of paper before trying it on the final paper.
- Being okay with failure – there were a lot of mistakes we couldn’t fix along the way, but we kept them in perspective.
- The value of taking your time on something – we were both pleased and surprised by the final results.
- Taking responsibility for your mistakes – My son pointed out an area he messed up on to my wife when he showed her his final picture, then explained how he messed up because he didn’t follow directions right. Normally, he would have blamed a mistake on what he was working with or something else besides himself.
Overall, this was a lot of fun and a good, memorable experience for us both. Maybe you have similar ideas for projects you can do with your kids that can have dual purposes as well.


Leave a comment